


Wow! I cannot believe that Thanksgiving is here! This year has flown by! And I have so much to be thankful for. I am so thankful for my husband and his support. For my community that I am building here in Seattle. My family. And my amazing clients that support me and because of them I get to pursue my passions!!
So this year – I wanted to share my gratitude with this little community I am building here in Seattle – so I decided to host a Friendsgiving! Then reality set in…and I realized that the host..normally does the turkey (or so I was told.) I like to cook…but I’m no chef! And had NO IDEA how to roast a turkey – let alone a turkey that could feed 20 people!! Haha
But this last week…I stepped into a new season of adulthood.
I made my first Turkey!! And..since I had never done it before – I thought the logical thing to do was invite 20 friends over to try my turkey the first time I made it! haha no pressure! Well a special thanks to my sweet friend and chef Quynh (also the artist behind gorgeous paper flowers Pink + Posey) and my dad for walking me through it! And I’m thrilled to say the turkey and Friendsgiving was a success!!!
I am starting a new series called “How to be an adult” because as an “adult” – there are certain things I thought I would know, but realized I’ll never just suddenly be filled with knowledge…I need to embrace the unknown, try – seek advice – and simply…learn how to be an adult. :) So there you have it. To kick off this series…I embraced…roasting my first turkey.
So I thought I had to share the recipe and what I learned! So if you are roasting a Turkey for a holiday party or Christmas dinner – this will be a great and fool-proof recipe for you! The process was fairly easy and but it was spread out over 5 days!But you can also apply a lot of these tips and tricks from the later part of the recipe for your Turkey tomorrow! (Full Grocery list will be at the bottom of this post )
For some – doing a Turkey over 5 days may sound crazy. But here was my logic. I was told…that if I brine my turkey… the Brining process covers up a multitude of sins. So if I don’t roast it right or something (which was pretty likely) it will still turn out great because of the brine and all the moisture in the meat. So when I heard that – I was like, YUP! Worth the effort! And I can say that theory was tested and approved! So here we go!
Essentials:
- A garbage bag, pot, cooler, or bucket big enough to drown the turkey – where it is completely submerged.
- A large enough fridge or garage to keep the turkey (while in the brine) cold
- A Large roasting pan – the bird shouldn’t touch the sides of it will scorch. You can get the largest foil pans at Kroger and that will fit a 16-17 lb turkey.
Step 1: Buy a turkey. We bought a 16 lb turkey and it fed 23 people perfectly! But there barely any leftovers!
Notes: If you buy a fresh turkey – you obviously don’t have to thaw it out so you can start the cooking process faster if you don’t have a lot of time. But if you buy a frozen turkey – be sure to let it thaw (at least 3/4s of the way) before moving to the next steps. We got our turkey lightly chilled from Costco and it didn’t take long to thaw. But we bought it Sunday so it would be thaw by Monday morning to than roast it on Thursday for our Friendsgiving.
Step 2: Make the Brine.
Note: You will need to first use a big pot so you can boil the brine – then either use the same pot of transfer to a large bucket that will fit your turkey and the brine.
To see what I mean by brine : click here for the video!
Step 2 :Brine from Kelly Lemon on Vimeo.
The Brine Ingredients are:
1.5 Cup of Kosher Salt
1 Cup of brown sugar – packed
1 Whole Onion – cut in 1/2
1 head of Garlic – remove the skins around the garlic and then cut the top off so you can see the garlic cloves
1 Piece of fresh Ginger
1 Cinnamon stick
1/4 cup of peppercorns
2 Meyer Lemons (cut in half and squeeze all the juices out)
5 Clementines (cut in half and squeeze all the juices out)
Then add the Aromatics!
Fresh Rosemary, Thyme and Sage! (half of each package so you can save the other half for the turkey)
5 Quarts of cold water
Instructions:
- Bring your brine to a boil – then turn off the stove right after it comes to boil. And let it cool down completely. Usually takes about 1 hour or two. Remove the giblets from inside the cavity of the turkey. You can either toss the giblets or chop them finely and save for your gravy. Then put the turkey in the brine. (We did this on Monday or our turkey week)
- Brine your turkey for 2 days in the fridge. Then on the 3rd day (Wednesday), take the turkey out and put it on a roasting rack. Toss the brine. Note: Do this over the sink, because the brine can go everywhere when you take the turkey out!
- Put the roasting rack in the fridge uncovered, so the turkey can air dry for at least one day.
NOW ITS TURKEY DAY!!
Since we had a 16lb turkey and our party start at 6pm – we put the turkey in at 12:00pm and planned to take it out between 4:00 – 5:00 depending on the internal temperature of the meat and how hot your oven gets. One general rule of thumb is about 15-17 min per pound. I will show you our schedule – then go into detail on how to do some of the steps!
Our schedule looked like this:
10:00am – Pull the Turkey from the fridge.
11:00am – Preheat oven at 325 degrees
11:00am Start prepping the turkey – herbs, butter etc (explanation below)
12:00pm Turkey Goes in the oven!
1:00 pm Baste the turkey while it’s still in the oven (soak the juices from the bottom and pour it over the turkey, and do it quickly so the oven doesn’t loose much heat)
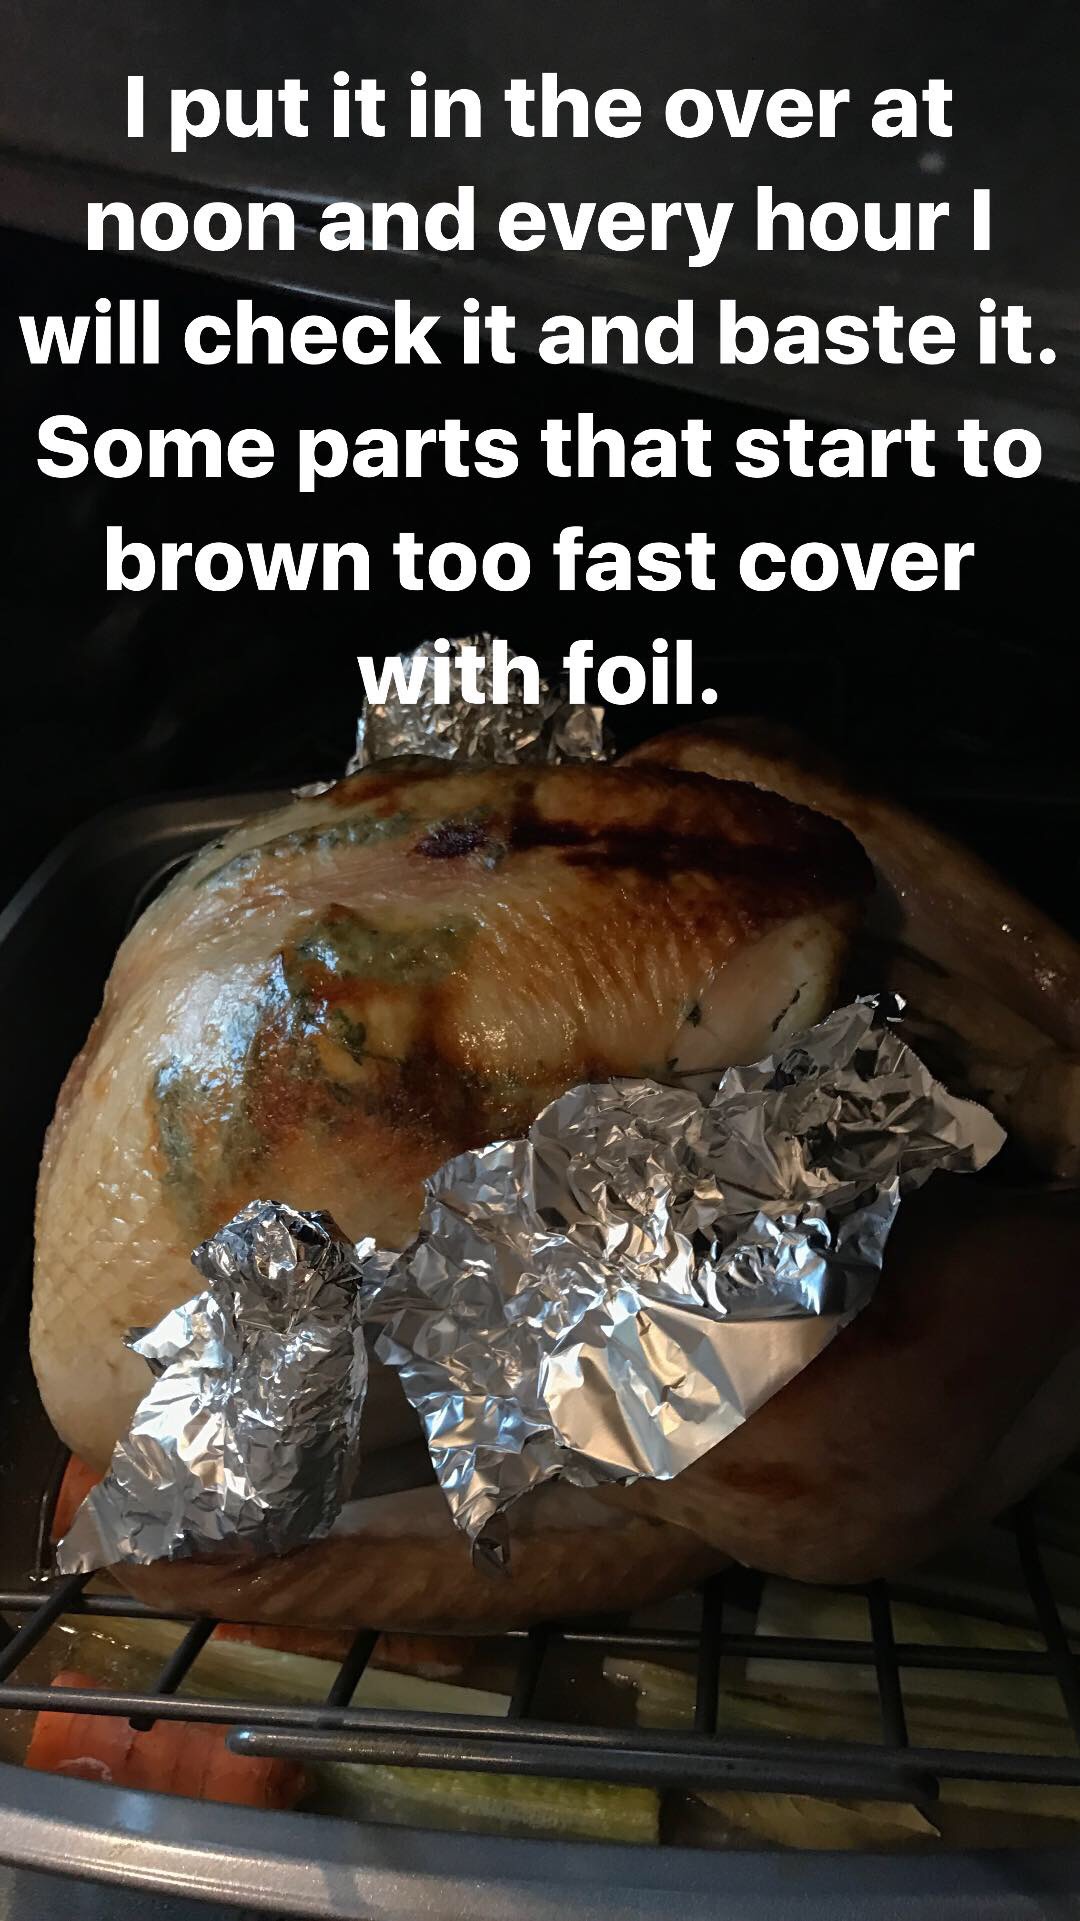
2:00pm Baste the turkey and check for spots that are browning too fast.
3:00pm Baste the turkey and check for spots that are browning too fast. If a spot is too brown, put a piece of foil around it
4:00pm Baste, check for browning, and check internal temperature of the meat. Put it in the breast of the turkey but do not have the thermometer touch a bone. **Do not leave the meat thermometer in the oven! I made that mistake and luckily it didn’t break but was I was told not to do that! So that’s good advice :)
4:30pm Repeat process from 4:00 pm – depending on the temperature of the meat – you will know if its ready or if you need to lower the oven temperature.
*If the meat temp is less that 130 degrees – than raise the oven temp to 350 degrees. If the meat temp is above 130 – then lower the meat temp to 275 degrees.
Health Codes say that the Turkey is fully cooked when its Temperature reaches 165 degrees. But you don’t want much higher to make sure the turkey stays really moist!
The exact timing and temperature part varies a lot depending on your oven. We learned that my oven cooks really fast and gets really hot. But now I’ll go into detail about prepping the turkey!
Step 3: PREP THE TURKEY.
First : Add a bundle of carrots and celery to the pan, below the roasting rack. (use the whole bunch of – just cut them in half and cut off tops of carrots)
- Separate the skin from the meat – all the way around. Then make your herb butter. Now chop 2 cloves of garlic, 2 tbsp of Rosemary (chopped), 1 tbsp of sage, 1 tbsp of thyme, italian seasonings and combine with the softened butter (up to 1 stick).
- Add the herb butter (room temperature) to your hands and spread it onto the meat under the skin. The legs seem impossible at first, but just slowly try to separate the skin as much as you can on the legs. After spreading butter (some people use as much as a stick of butter! We only used about 1/3 of a stick.)
Buttering a turkey! from Kelly Lemon on Vimeo.
- Stuff the turkey. Inside the turkey cavity put the following: 1/4 onion, 5 cloves of garlic, 1 lemon (cut in half), fresh sage, thyme and rosemary. We didn’t have rosemary but it still tasted great!
Stuffing the Turkey! from Kelly Lemon on Vimeo.
- Turkey is now ready and buttered.
- As you put the turkey in the oven, pour 1 bottle of Riesling into the bottom roasting pan. Do not pour it over the turkey – just below it with the carrots and celery.
Pour in your bottle of Riesling! from Kelly Lemon on Vimeo.
Step 4: ROAST THE TURKEY
Follow the steps above, basting every hour. For those that are new to cooking – basting means you take a turkey baster (looks like this) and take the juice from the bottom pan and put it oven the turkey, in the crevices and let the juices get all over the turkey.
- Check for browning. The wings started brown really fast and we didn’t want them to burn so we put foil around the area where it was dark brown. The foil doesn’t have to be super tight, just tight enough to stay on.
- Then at about 4:45 we lowered the temperature to 275 degrees because our meat temperature was 170 degrees and we didn’t want it to get much higher.
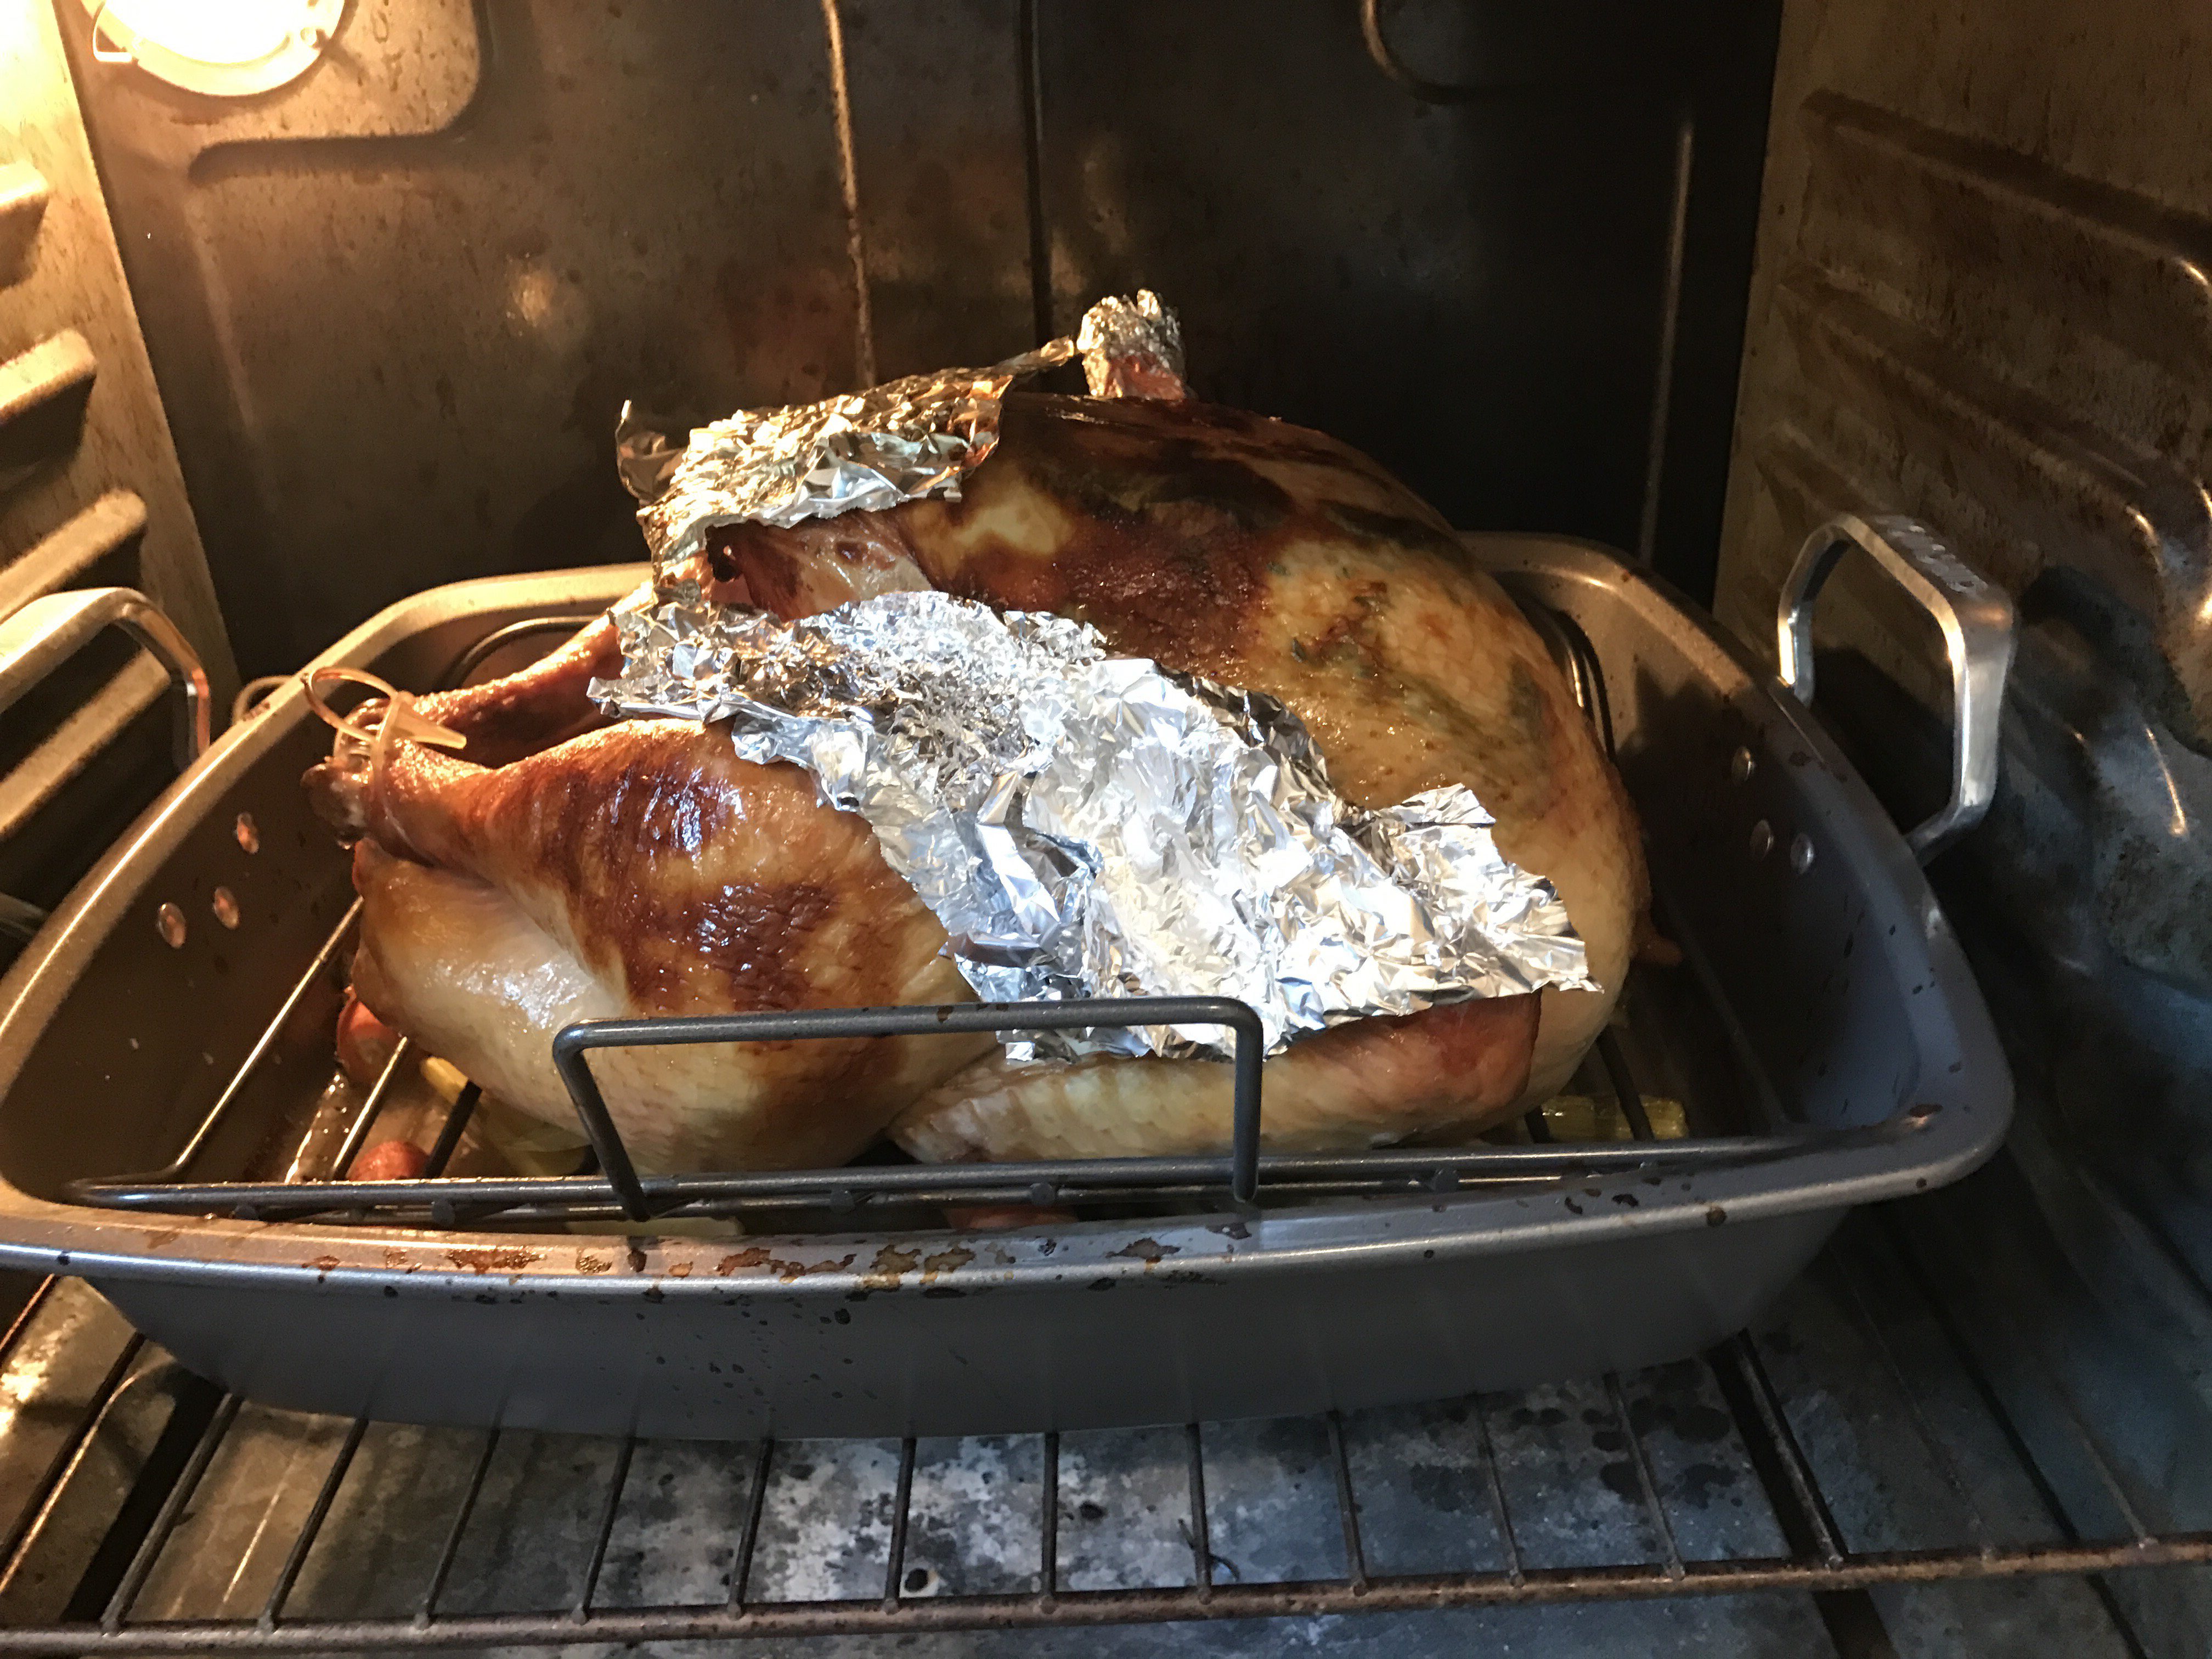
- Then about 5:00 the turkey looked finished! We checked the temperature and it was around 170 degrees and we lowered the temp in the oven to 200 degrees – just to keep it warm but not over cook it!
- My sweet friend Quynh helped me carve it – and since all my guests arrived right when I was taking the turkey out of the oven – I was silly and forgot to take a nice photo of it! haha (so silly!) But here it is in the oven right when it was about finished!
 So there you have it! It was my first turkey and I must say…it was DELICIOUS!! Actually one of my favorite turkeys I have ever had !! haha And thats definitely not because of me – but the brine process makes the flavors so nice and moist!! Special shout out to my sweet friend Quynh and my dad for answering my random and dumb questions!! Happy Turkey day!!
FULL GROCERY LIST:
The Brine + Turkey Ingredients combined for a concentrated list:
1.5 Cup of Kosher Salt
1 Cup of brown sugar – packed
2 Onions (1 big onion for the brine and 1/4 onion for the turkey)
2 head of Garlic
1 Piece of fresh Ginger
1 Cinnamon stick
1/4 cup of peppercorns
3 Meyer Lemons (cut in half and squeeze all the juices out) – 2 lemons for the brine and 1 for the turkey
5 Clementines (cut in half and squeeze all the juices out)
Then add the Aromatics!
Fresh Rosemary, Thyme and Sage! (one pack each should be enough for the turkey and the brine – depending on how big your turkey is
1 stick of unsalted butter
1 Bunch of Carrots
1 bunch of celery (is bunch the right term? )
1 bottle of Riesling


This is so great and helpful! I can’t wait to put it to use when we’re out of this little one bedroom apartment and can host :) Happy Thanksgiving!